The Second Battle of El Alamein lasted from 23 October 1942 to 11 November 1942. The 185th Paratroopers Division Folgore at El Alamein fought with incredible courage and tenacity. Their actions against incredible odds won the praise of the German allies and respect from the advancing Allies.
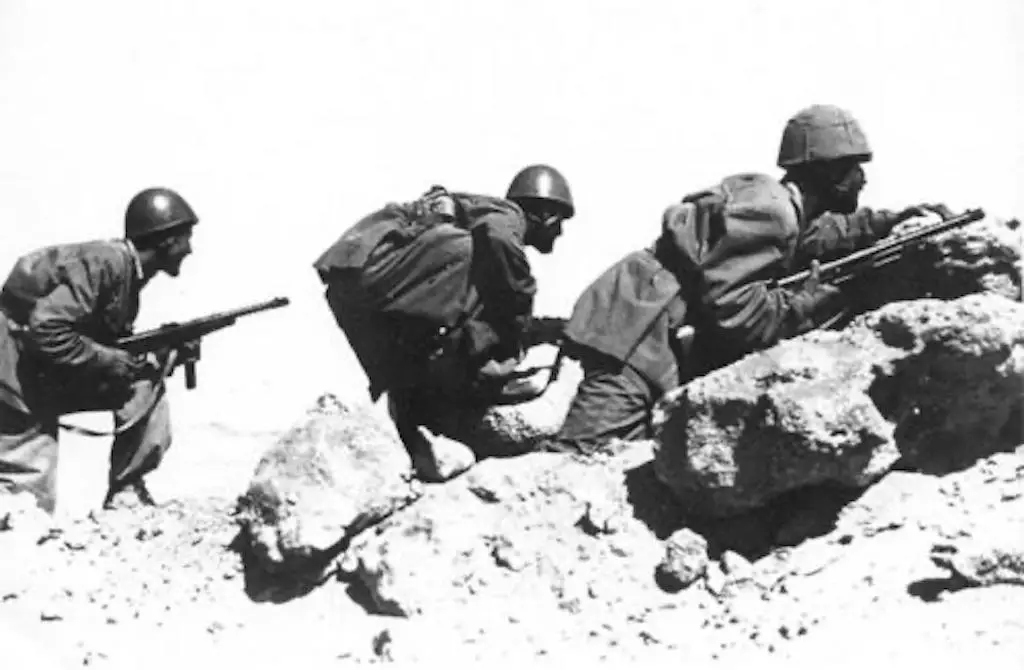
Folgore on patrol in North Africa.
On 30 August 1942, General Erwin Rommel unleashed Operation Brandung, a concentrated attack undertaken by his Deutsch-Italienische Panzerarmee (ACIT – Armata Corazzata Italo-Tedesca) against the tired yet stout British and Commonwealth forces, designed as a follow-up engagement launched on the heels of the recently concluded First Battle of El Alamein .
The fighting during First El Alamein petered out less than two months earlier, ending in what many consider a stalemate between the opposing sides. The goal of operation Brandung was for the forces of the Italian-German Panzerarmee Afrika to outflank and then engage the British 8th Army, now under the commanded of General Bernard Montgomery. The 8th formed its position just south of El Alamein, and it would be here that they would face Rommel’s weakened, but still dangerous force, in the next round of their epic encounter.
Montgomery’s Trap
Using Ultra intercepts that forewarned the upcoming Axis operation, Montgomery prepared a new defensive alignment to support his change in the 8th Army’s philosophy on the use of its armor. He hoped this philosophy would inflict severe damage to the advancing Axis forces while sparing his armor from the expected pounding in tank versus tank combat – an arena in which the Germans held the advantage.
Montgomery’s new plan shunned past British doctrine of sending it’s armor out to engage Axis tanks ‘in the open.’ Instead, the valuable tanks were to stay ‘protected’ in the distance and fulfill an ‘anti-tank’ role. To put this philosophy into practice, Montgomery had cleverly left a ‘gap’ in the southern sector of the front designed to funnel Rommel’s attacking forces into his ‘trap,’ a substantial grouping of British tanks and artillery near Alam el Halfa ridge.
At the onset of the Axis attack, the Deutsch-Italienische Panzerarmee forces had indeed played into Montgomery’s hand during their attempted flanking maneuver to the south. Diverting to the shadow of Alam el Halfa, Montgomery ‘sprung the trap’ that waited patiently for them. The attackers sustained heavy losses to their exposed armor as Montgomery expertly parried Rommel’s overly aggressive nature.
Rommel’s Retreat
The Desert Fox was defeated. With the British Desert Air Force pounding his troops from above and his supply situation critical, Rommel called for a general retreat to prepare his defensive line for the inevitable British counter.
The Axis initiative in the North African campaign was lost, as was any chance they had to achieve ultimate victory in the desert. Montgomery chose not to follow this defensive victory by immediately pursuing the reeling Axis, a decision that received a lot of criticism. Instead, he decided to build up his forces for the next encounter to come; a confrontation he was determined to fight on his timetable and under his terms.
This upcoming confrontation, The Second Battle of El Alamein, would be considered one of the critical turning points of the entire war.
During the battle of Alam El Hafla, the Italian Airborne Division Folgore (185.a Divisione Paracadutisti “Folgore”) had been positioned to guard the left flank of the German 90th Light Division and the Ramcke Brigade and was successful in driving off an attack by New Zealand Infantry during a fierce encounter between the 3rd and 4th of September.
The German allies greatly respected the Italians’ performance in this clash, so much so that Wehrmacht leaders awarded 11 Iron Crosses to Folgore soldiers for their heroics on the battlefield. When news reached Montgomery on the outcome of the encounter, he became angered that his forces had been ‘thrashed’ by Italians, which he undoubtedly found unacceptable.
Folgore Capture Brigadier General G.H. Clifton
Shortly after this engagement, a Folgore patrol captured Brigadier General G.H. Clifton, commander of the New Zealand 6th Brigade. While scouting, he mistakenly drove his vehicle into the midst of a group of Folgore soldiers. They immediately took him and several of his aides captive at gunpoint.
During his subsequent interrogation by Rommel, General Clifton requested confinement at a German POW camp instead of an Italian one. He felt both angry and embarrassed at being captured by Italians. Rommel at first agreed, but after Clifton attempted an escape during a German interrogation, Rommel changed his mind, and the General transferred to Italy for internment.
A skirmish with British 131st Infantry Brigade
By the end of September, the Folgore found themselves locked in battle contested in the Egyptian desert’s blowing sands. This time they were opposed by the British 131st Infantry Brigade, which boasted heavy artillery and a contingent of tanks supplied by the Scots Greys, attached to them to provide support against the Folgore.
In a preview of what would come to pass at Second El Alamein, the soldiers of the 185th Folgore Division, particularly members of the 9th Btn, delivered an impressive defensive victory, mauling the British in this encounter. Inflicting approximately 400 casualties upon the British forces, the Folgore suffered less than 50 casualties while repulsing the attack.
The soldiers of the Folgore were quickly establishing a reputation as a formidable opponent. Soon this reputation would be put to the test, as Montgomery’s southpaw hook delivered during the opening phase of Second Alamein headed towards the 14k stretch of line manned by the Folgore.
Canceled Plan: Operation C3, Invasion of Malta
Months before finding themselves locked into one of the greatest battles of the war, the Folgore Division were to participate in the planned assault on the island fortress of Malta. Operation C3, scheduled for the spring of 1942, would provide the Folgore a crucial role in the Axis plan to wrest control the critical Island from the British. The Folgore was a tightly knit and highly skilled unit, and they possessed perhaps the greatest ‘esprit de corps’ of any Italian division during the war.
The attack never happened. When Rommel regained the upper hand in the Desert War early in 42, accomplished at a high cost in both material and fuel, he pushed for Hitler to ‘postpone’ Operation C3 to concentrate all available Mediterranean resources for a renewed push into Egypt.
Hitler agreed with his ‘favorite’ General over the objections of the whole Italian Comando Supremo, who felt that a push towards the Suez was unfeasible on logistical grounds. Their belief that the limited handling capacity of Axis controlled ports and the limited supply trucks available were not enough to sustain operations so far from logistic supply heads.
The attack on Malta was canceled once Hitler persuaded Mussolini to give his blessing in favor of allowing Rommel the chance to continue his advance.
Arrival of Folgore
Because of the canceled invasion, the Folgore dispatched to Africa to assist the Axis cause. The first Folgore troops arrived on the scene in July 1942. Officially renamed under the cover name of 185th “Cacciatori d’Africa” Infantry Division, although reports and dispatches continued to refer to them as 185th “Folgore” Parachutist Brigade, this “Division” would prove it’s worth to the Axis cause many times over.
By late October of ’42, the Folgore now found itself dug along a stretch of the southern portion of the Axis line. Under the command of General Enrico Frattini, the division was doing its best to rest and reorganize after their victorious but grueling battles against the Allied forces the previous month.
Italian and German engineers in the area worked diligently to strengthen the existing minefield created by the British but was now in Axis hands, to provide a daunting defensive obstacle in front of their positions. Rommel’s extensive use of mines in both number and depth at the Second Battle of Alamein earned these lethal patches of the earth the nickname of “the Devil’s Garden” by the advancing British forces. Only the advanced and finely honed mine clearing techniques the British had developed during the war allowed their forces to make steady if slow progress through these fortified areas once the battle commenced.
The Folgore was assigned a position within the X Corps. It’s deployment situated between Haret-el-Himeimat and Deir-el-Munassib. The placement of the Folgore along the line at Second Alamein consisted of three main sectors; north, central and south.
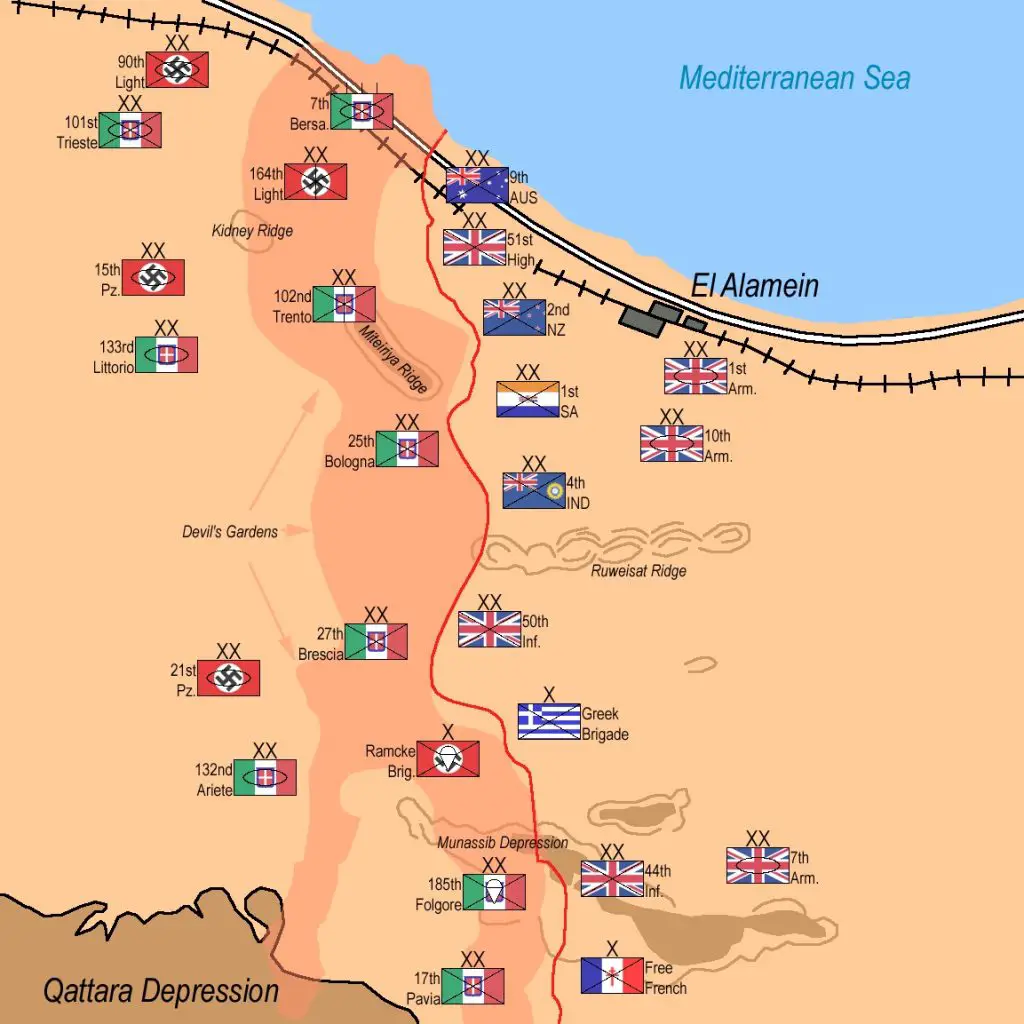
Deployment of Forces on October 23rd, 1942 during the Second Battle of El Alamein. Image: Noclador, CC 3.0.
Folgore OOB in North Africa
Divisional Command and HQ Company
185th Mixed Carabinieri Company (Military Police)
260th Field post office
20th Supply section
20th Logistical section
185th Medical section
185th Transports unit
20th Mortars Company (81mm mod.35)
185th Signal Engineers Company
185th Mixed Miners-Construction Engineers Company
8th “Guastatori” Parachutist Battalion, with :
HQ Company
22nd “ Guastatori” Parachutist Company
23rd “ Guastatori” Parachutist Company
24th “ Guastatori” Parachutist Company
186th Parachutist Infantry Regiment, with:
Regimental Command and HQ Company
Regimental Guns Company (47/32 mod.35)
2nd Parachutist Infantry Battalion, with:
HQ Company
4th Parachutists Rifle Company
5th Parachutists Rifle Company
6th Parachutists Rifle Company
4th Parachutist Infantry Battalion, with:
HQ Company
10th Parachutists Rifle Company
11th Parachutists Rifle Company
12th Parachutists Rifle Company
9th Parachutist Infantry Battalion, with:
HQ Company
25th Parachutists Rifle Company
25th Parachutists Rifle Company
26th Parachutists Rifle Company
27th Parachutists Rifle Company
10th Parachutist Infantry Battalion, with:
HQ Company
28th Parachutists Rifle Company
29th Parachutists Rifle Company
30th Parachutists Rifle Company
187th Parachutist Infantry Regiment, with:
Regimental Command and HQ Company
Regimental Guns Company (47/32 mod.35)
5th Parachutist Infantry Battalion, with:
HQ Company
13th Parachutists Rifle Company
14th Parachutists Rifle Company
15th Parachutists Rifle Company
6th Parachutist Infantry Battalion, with:
HQ Company
16th Parachutists Rifle Company
17th Parachutists Rifle Company
18th Parachutists Rifle Company
7th Parachutist Infantry Battalion, with:
HQ Company
19th Parachutists Rifle Company
20th Parachutists Rifle Company
21st Parachutists Rifle Company
185th Parachutists Artillery Regiment, with:
Regimental Command and HQ battery
1st Parachutist Artillery Battalion, with :
HQ Battery
1st Parachutists Artillery Battery (47/32 mod.35)
2nd Parachutists Artillery Battery (47/32 mod.35)
2nd Parachutist Artillery Battalion, with :
HQ Battery
3rd Parachutists Artillery Battery (47/32 mod.35)
4th Parachutists Artillery Battery (47/32 mod.35)
3rd Parachutist Artillery Battalion, with :
HQ Battery
5th Parachutists Artillery Battery (47/32 mod.35)
6th Parachutists Artillery Battery (47/32 mod.35)
At the beginning of September the division deployed in the southern sector of the El Alamein line as part of the X Corps (together with the 17th Infantry division “Pavia”) and reorganized as follows :
“Ruspoli” Tactical Group (7th and 8th Battalions)
“Bechi” Tactical Group (2nd and 4th Battalions)
“Camosso” Tactical Group (9th and 10th Battalions)
“Tantillo” Tactical Group (5th and 6th Battalions)
Tactical Artillery Group
The divisional artillery disbanded the 2nd Battalion and split among the Tactical Groups, together with the other divisional assets.
To overcome the lack of field artillery (the divisional artillery regiment had only 47L32 AT/IG), the “Folgore” Tactical Artillery Group under Colonel Boffa, formed with the following units :
2nd Battalion/26th Artillery Regiment “Rubicone” (75/27 mod.06 – from the “Pavia” Division)
4th Battalion/26th Artillery Regiment “Rubicone” (100/17 mod.16 – from the “Pavia” Division)
1st Battalion/21th Artillery Regiment “Po” (100/17 mod.16 – from the “Trieste” Division)
3rd Battalion/1st “Celere” Artillery Regiment (75/27 mod.06 – from the “Brescia” Division)
21st Battalion/132nd Artillery Regiment “Ariete” (88/55 FlaK 37 – from the “Ariete” Division)
3rd Battalion/132nd Artillery Regiment “Ariete” (90/53 mod.41 – from the “Ariete” Division)
Provisional Battalion/ 155th Artillery Regiment (8,8cm Flak 37, 10cm K18 and 21cm K38 – from the Geman 21st Panzerdivision)
Some Notes
The Italian battalions utilized roman numerals (IV, IX, XXI, etc.). In the OOB, those numbers have been “translated” in standard Arabic numerals to avoid confusion.
The Italian artillery battalions were named “Gruppo” (Group). The composite, regimental-sized Artillery group commanded by Col. Boffa was named “Raggruppamento” (that still means Group in Italy). To avoid confusion, the battalion-sized artillery units have been called “battalion,” and the composite group as “group.”
The “Carabinieri” is the Italian Military Police Corps. It is still unclear if the company attached to the “Folgore” division was parachute-trained, or not (like the other non-combat divisional support units).
The “Guastatori” were troops trained in assault tactics against enemy trench-works and fortifications. They were the equivalent to the German Assault Engineers. The Italian army did have both Engineers “Guastatori” units and Infantry “Guastatori” units, sharing much of the same training. The 8th “Guastatori” Parachutist Battalion was an infantry “Guastatori” unit.
Positioning
The 187th Regiment handled the northern sector on the far left of the Italian position, which butted up against the line held by the German Ramcke Fallschirmjager Brigade. The 2nd and 9th Battalions provided the backbone of the defense with support from the 185th Artillery Regiment. The 4th Battalion covered the perimeter locations in this sector.
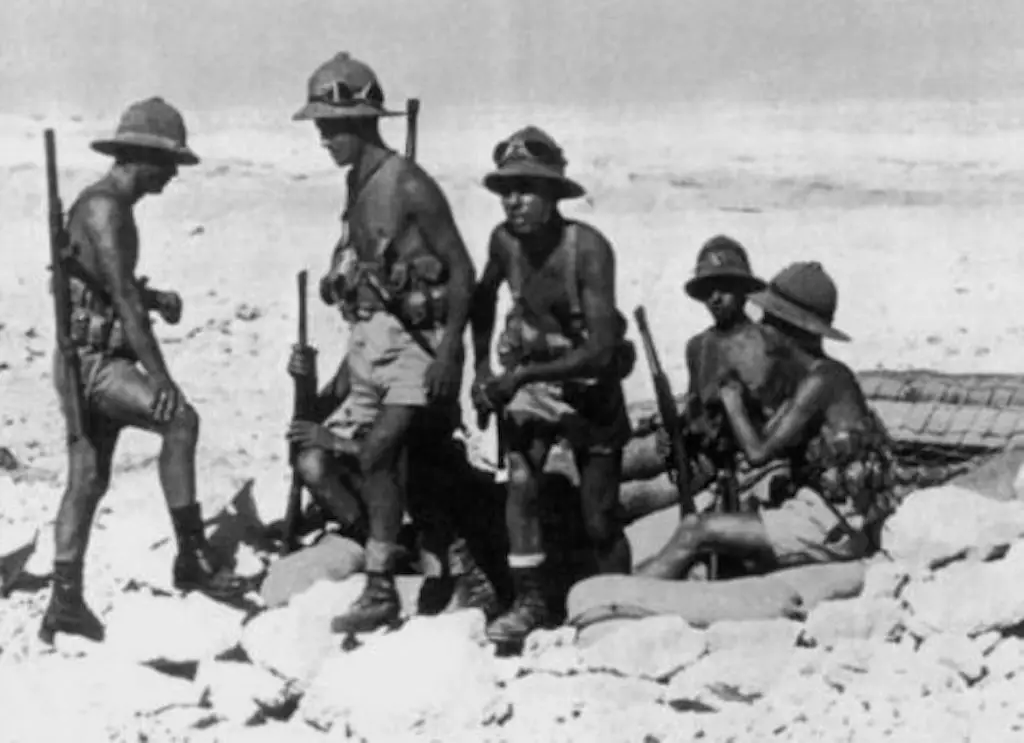
185th Paratroopers Division Folgore in North Africa.
The 186th Regiment held the southern sector, flanked on the right by the Italian Pavia Division. Additional support in this sector was provided by allocated mortar and gun platoons. As was heavier firepower in the form of attached Italian 75mm and 88mm guns. Highly skilled soldiers of the heavy AA/AT artillery battalion of the “Ariete” Armored Division manned the 88s.
The center section of the Italian line lay by the 7th and 8th “Guastatori,” and several detachments of infantry provided by the Pavia Division. Dispatched from the 186th Regiment was a 47mm ATG company to accompany two gun and two mortar platoons, who assumed positions in the center of this section. The 185th artillery found itself dispersed among all the Tactical Groups. The 88s (and the similar 90/53) did not belong to any specific group but used as mobile assets dispersed to the various groups during different phases of the battle.
The Importance of El Alamein
Many military historians consider the Battle of El Alamein as one of World War Two’s critical turning points. The 8th Army’s victory here helped to lead to ultimate Allied triumph. By the eve of Second El Alamein, Rommel had already shot his bolt over the previous months of battle, and his materiel and fuel-starved army had gone as far as they would, or realistically could, in the Desert War.
It would be under the immense historical spotlight of this significant encounter that Italian forces would deliver one of the most epic performances of the entire conflict. This performance would earn respect and recognition of the Folgore’s enemies and its hard-to-impress ally.
On 23 October 1942, Montgomery began his much anticipated Allied offensive. The first step, known as Operation Lightfoot, initiated with an artillery bombardment, the like of which that had never before seen during the entire North African Campaign.
Targeting the Italians
While Montgomery’s main thrust targeted the northern section of the whole Axis front, the fighting in the south would be just as intense. The main focus for the Allied assault on the southern part of the Axis line during the Lightfoot operation sought the supposedly “weak” Italian-held areas. After the opening artillery bombardment, soldiers from the 1st Free French Brigade, 1st Greek Brigade, plus armor and infantry from the 7th Armored Division, slammed into the Folgore’s positions in an attempt to overwhelm its defenders and break into the rear of the Axis line.
The Allies surrounded or smashed some of the forward Italian positions at the onset of their attack, but stifled as they approached the Italian defense’s main line. The fighting raged into the early morning of 24 October 1942 as each side fought hard in this ferocious encounter. The Italian Folgore would hold its ground and proved victorious, with the attackers only able to gain a minimal amount of ground.
While the bravery of the Folgore at El Alamein has often received praise and admiration, its soldiers’ skill level is often overlooked. They not only best the opposition solely by their courage, but they often out-fought them through superior military aptitude.
Folgore’s Use of Anti-Tank Artillery
The Italians’ brilliant use of the Artillery Group, whose tactics and operational procedures are seen by some as superior to their German allies in the North African theater, was crucial to their success. Their ability to bring down accurate and often deadly fire to separate enemy armor from their infantry support made their role indispensable.
The discipline and proficiency of the Italian anti-tank gun teams were continually called upon to stem many Allied armored advances, often from a precariously close distance.
The Italians had routed the French forces, and their British counterparts from the 44th Division fared little better. For hours after this battle, fire and smoke emanating from several destroyed British tanks gave off an eerie glow into the still darkness of the African morning, the sight a smoldering symbol of the Italian’s merciless stand.
The initial British thrust failed with hundreds of soldiers suffering heavy casualties, including those from the Royal West Kents, Greys, and the Buffs. The Folgore also sustained a high number of losses after the first night of fighting, particularly the 8th Battalion. But they held the line. The British could not break through as planned. The advance had gained far too little ground in comparison to the number of casualties stretched out on the desert floor before the Italian positions.
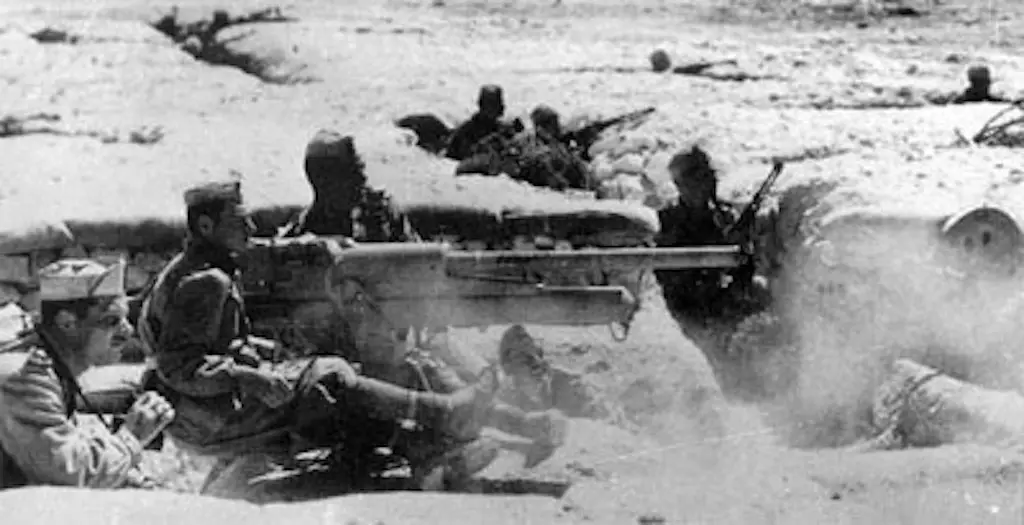
Folgore manning 47/32 gun.
Italian Counterattack
Between 25 and 26 October 1942, the British had only gained minimal ground against fierce opposition from the dug-in Folgore. Realizing that even these small gains in the lines would potentially give the British a toehold for further operations, the Italians launched a counter-attack spearheaded by the 7th Btg to drive off the enemy.
Italian troops overwhelmed Montgomery’s forces once again. The Allies retreated to their start line after suffering a high number of casualties during this encounter. Reports state the Folgore destroyed nearly 30 British tanks on the 25th alone. This is an incredible amount when one compares the mismatch in firepower employed.
On the 26th, the British attempted to concentrate their attack on the southern portion of the Italian line. The British committed a sizable force to battle, including the Green Howards Rgt., 4/8th Hussars Btn., and the Royal West Kent, to break through the Italian defense to engage the German positions behind the initial Folgore sector. Small initial gains by the attackers against isolated ‘outposts’ led them eventually straight into Italian strong points. The defender’s expert use of their anti-tank guns helped in part to once again halt the Allied advance.
Cul de Sac Maneuver
To help compensate for the overwhelming disadvantage in firepower, the Folgore utilized an ingenious yet dangerous tactic to counter the immense British superiority in armor throughout the battle. With a limited number of guns at their disposal to stop modern tanks, the Italians employed a “Cul de Sac” maneuver. Soldiers would engage British armor separated from its infantry support that crossed into the Italian lines. Once inside the Italian lines, small groups of Folgore would burst out of camouflaged positions. They charged forward, engaging the unsupported British tanks or vehicles at close range.
The Folgore utilized just about anything explosive they possessed, from grenades to improvised Molotov cocktails. These often suicidal charges proved highly effective at both destroying British armor and at unnerving the Allied soldiers who witnessed the assaults or heard rumor of the destruction and mayhem the Folgore inflicted.
A Littered Battlefield of Destroyed British Tanks
Throughout the Battle of the Second El Alamein, a tank group from the German 21st Panzer Division, along with elements of the Ariete Armored Division, had stood by in the rear behind the Folgore to act as a reserve to counter any British breakthrough that might occur. The Folgore never needed to call upon them during the entire battle as they had proved more than a match against the Allied units.
The British 132nd Infantry Brigade/44th Inf. Div and French forces were once again repelled on 27 October 1942. Operations against the Italians temporarily halted. The British military leadership reluctantly conceded that although they held a numerical superiority in almost every category over their adversary, they could not defeat the Folgore in this sector with the forces they had so far employed.
The battlefield that stretched in front of the Folgore’s position lay littered with the broken remains of British tanks and vehicles. The British lost a staggering amount of armor. Estimates range from 60 to 120 vehicles destroyed or immobilized during the engagement. It was accomplished by Italian defenders who were ‘lightly’ armed, but still managed to demolish almost everything thrown at its ranks, including the massive Grant tanks. The British suffered the loss of over 1,100 men, including hundreds forced to surrender to avoid annihilation.
Operation Supercharge and Breakthrough
Montgomery was not yet done with his offensive. The vast material, fuel, and air advantage he held were about to be brought to bear against Rommel’s entrenched defenders. In the early morning darkness of 2 November 1942, the next phase of Montgomery’s plan, Operation Supercharge, began. In the northern section of the Axis line, Allied troops began to break through and exploit their earlier gains as the Allied offensive unfolded. The Folgore troops to the south were now in danger of being cut off or surrounded because of the breached northern line. Rommel, defying Hitler’s explicit command to stand his ground, ordered all Axis forces to fall back on the night of 2-3 November 1942.
Historians differ on the merit of this decision. Some praise Rommel’s tactic as sound and perhaps the only option he had to avoid the risk of having his entire army destroyed where they stood. Others believe that Rommel simply lost his nerve. He ordered a meaningless retreat that pulled back his defenders from their entrenchments and defensive lines and denied them their artillery support. They further point out that the Axis troops were now openly facing a stronger and more mobile opponent, who would quickly be able to call upon these advantages.
A Difficult Retreat
Like most Italian ‘infantry’ units fighting in North Africa, the Folgore possessed limited transport. They therefore attempting a retreat on foot through the desert with only limited supplies, water, and ammo. This challenge was an almost insurmountable obstacle for practically all Italian infantry units during the retreat at Second El Alamein. The decision to retreat condemned many Italians to capture by Montgomery’s pursuing Eighth Army.
As the Folgore fell back from their lines, they pulled their artillery by hand through the sand. However, they continued to employ them when possible against their British pursuers. British armored car squadrons continued to attack the retreating soldiers, whose exhaustion from lack of food, water, and the strain of battle increased by the hour.
Several times during the retreat, British officers called out through loudspeakers across the endless sand, asking for the Italians to surrender. Repeatedly the soldiers of the Folgore refused the offer,. They often answered the request with gunfire directed at the British or solely with shouts of “Folgore.”
Folgore Resistance at Second Battle of El Alamein Ends
By 6 November, only a handful of the original 5,000 Folgore remained. The others were killed or captured during battle or in retreat. The surviving troops had collectively expended almost every piece of ammunition they had possessed to hold the British at bay. The men could hold out no longer. So this was the day that all organized resistance from the Folgore was to end. The leaders of the last functioning group of combatants, Colonel Camosso and Major Zanninovich, decided to lay down their arms. Their exhausted soldiers possessed minimal ammunition and supplies. They were now nearly surrounded by British armor and ground forces.
Incredibly a few Folgore who had chosen to continue the fight managed to avoid capture by the British. These soldiers made their way back into Tunisia. They joined the newly formed 285th Parachutist Battalion Folgore and continued the struggle for their beloved Italy.
Colonel Camosso ordered his surrounded soldiers to destroy their weapons before the surrender. He wanted nothing of material value to fall into the enemy’s hands. As it became apparent to the British that the Folgore stopped resisting, they advanced forward to secure the enemy they had come to respect over these many days of hard battle.
Praise for the Folgore
Upon making contact with the Italians, the British were impressed with what they saw. There was no white flag of surrender held by the Folgore. Nor did they find men clamoring for aid or comfort from the victors. The British found the warriors standing at ridged attention with their arms at their sides, staring resolutely forward, defeated but not bowed.
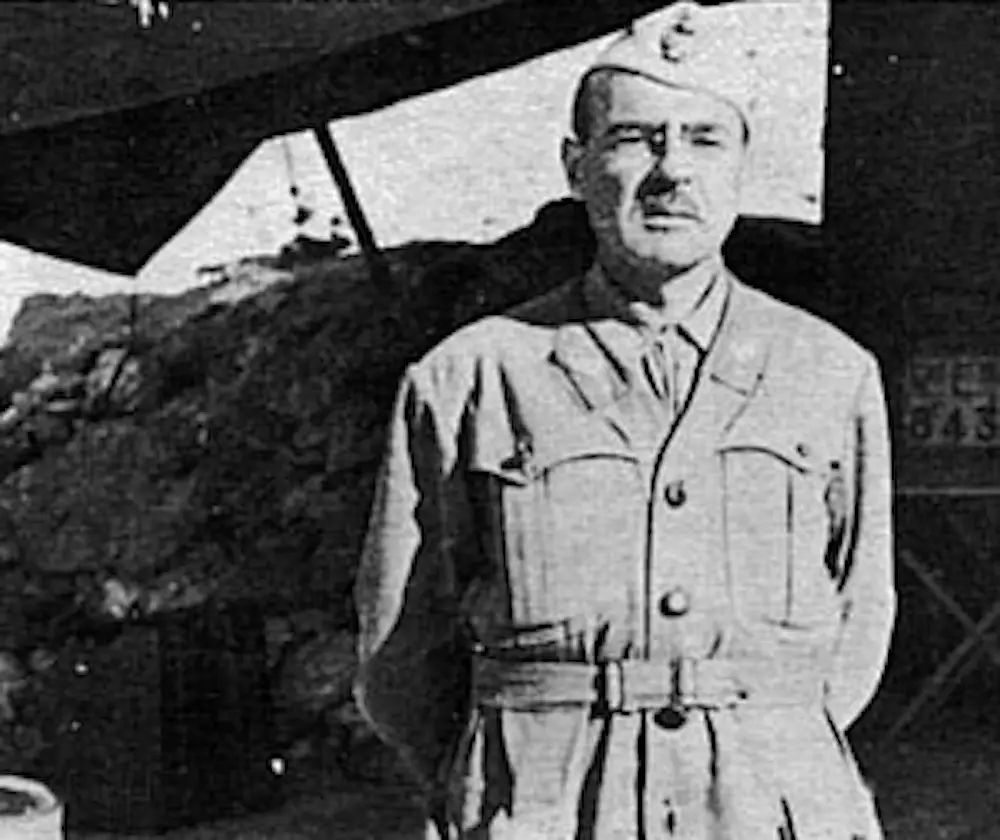
General Enrico Frattini
On 7 November, the commander of the British 44th Infantry Division, General Hughes, made an effort to meet with the Folgore’s commander, General Frattini. General Hughes’ men had suffered a high number of casualties against the Folgore, and the Allied General had been more than impressed with the resilience and skill of his adversary. Upon finding General Frattini amongst the captured Folgore, he saluted and expressed the highest of praise for the Folgore’s gallantry in combat. General Frattini replied with a simple “Thank you” for what more could be said.
I also wish to tell you that, during my long life as a soldier, I’ve never met such valiant men as the Folgore’s paratroopers.
Italian War Memorial Inscription at El Alamein
Many Folgore gave their lives in the desert that year. However, their performance, bravery, and courage have ensured that their legend is now immortal. Inscribed on the walls of the Italian Memorial at El Alamein are the words below. It is an everlasting tribute to perhaps Italy’s finest soldiers of the Second World War.
Fra le sabbie non più deserte
son qui di presidio per l’eternità i ragazzi della Folgore
fior fiore di un popolo e di un Esercito in armi.
Caduti per un’idea, senza rimpianto, onorati nel ricordo dello stesso nemico,
essi additano agli italiani, nella buona e nell’avversa fortuna,
il cammino dell’onore e della gloria.
Viandante, arrestati e riverisci.
Dio degli Eserciti,
accogli gli spiriti di questi ragazzi in quell’angolo di cielo
che riserbi ai martiri ed agli Eroi.
(English Translation)
Among the sand no longer deserted
for the eternity are here as a garrison the boys of the Folgore
the best flower of a people and a fighting army.
Fallen for an ideal, without regrets, honored even in the memories of their enemies,
they did show to the Italians, in the good and bad luck,
the path to honor and glory.
Passerby, stop and revere.
God of the Armies,
welcome the ghosts of these boys in that corner of heaven
You reserve for the martyrs and Heroes.
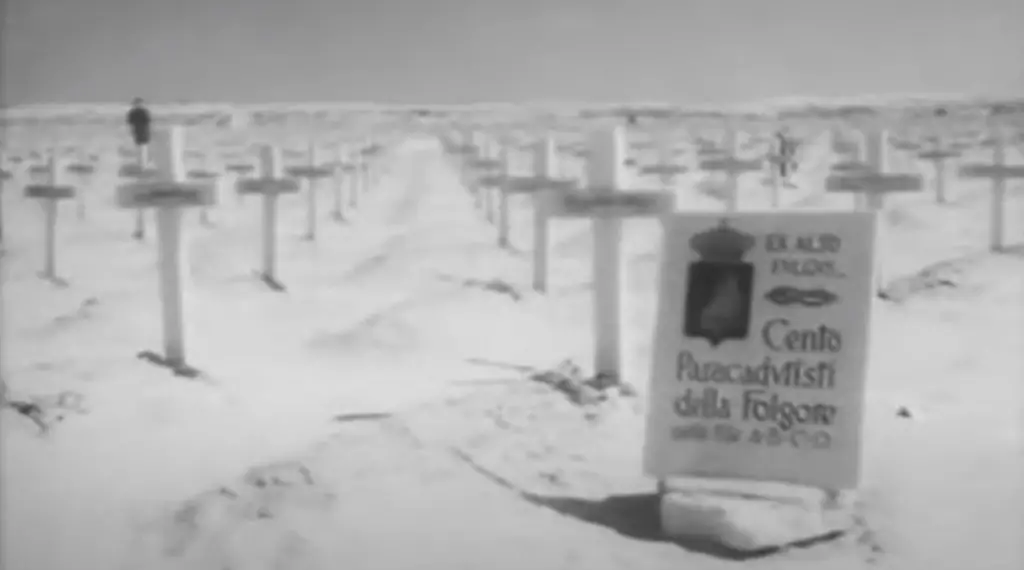
“One hundred Folgore parachutists” – The cost in blood at El Alamein was steep for the Folgore
Special thanks to Arturo Filippo Lorioli for providing both historical information and content, not to mention the finely constructed OOB. Also to Dennis Hussey for his suggestions and in helping to edit the article. The time spent and the invaluable contributions are much appreciated.
Book and Link References:
Folgore at El Alamein: By Mike Bennighof, Ph.D.
Italian WWII Airborne Units by Vince Tassone, March 2005
