On 29 June 1942, Rommel started a drive from Mersa Matruh that brought him to El Alamein. Two years of constant strain and combat wore down many of his soldiers. And yet on 15th, 22nd, and 27th July, the Brescia, Trieste, and Trento succeeded in pinning the 2nd New Zealand, 5th Indian, 9th Australian and 50th British Divisions between the Italian strong points and German armor and brought another series of disastrous defeats for the British commanders.
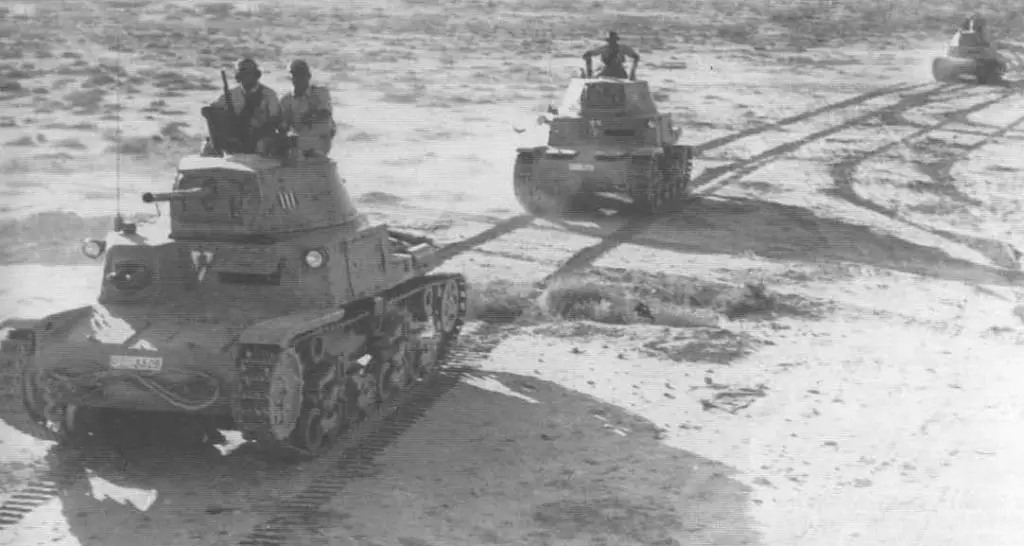
Littorio advance towards El Alamein in M13/40 medium tanks.
Under a Fading Moon
Following the British defeat at Mersa Matruh, the British Eighth Army under General Claude Auchinleck (Commander-in-Chief Middle East Command), who had succeeded General Neil Ritchie as Eighth Army Commander, withdrew to the vicinity of El Alamein, about 120 miles to the east. Unlike Mersa Matruh, the El Alamein positions could not be outflanked. The northern end rested on the sea, the southern end on the quagmire of the Qattara Depression. The 1st South African Division occupied the northern sector, the 18th Indian Brigade held the central sector and the 2nd New Zealand Division deployed in the southern sector. Auchinleck’s was to “hit the Italians whenever possible in view of their low morale.”
On the Axis side, Feldmarschall Erwin Rommel had the Afrika Korps, which consisted of 15th, 21st Panzer and 90th Light Divisions, various armored reconnaissance formations, plus the Italian Army. This consisted of Xth, XXth, and XXIst Corps, containing the Ariete, Littorio Armored and Trieste Motorized Divisions, plus four infantry divisions, the Pavia, Trento, Bologna, and Brescia, bolstered by Bersaglieri special shock troops. Rommel planned for the 90th Light to pin down and encircle the South Africans in the north, with the 15th and 21st Panzer Divisions striking the 2nd New Zealand Division in the rear.
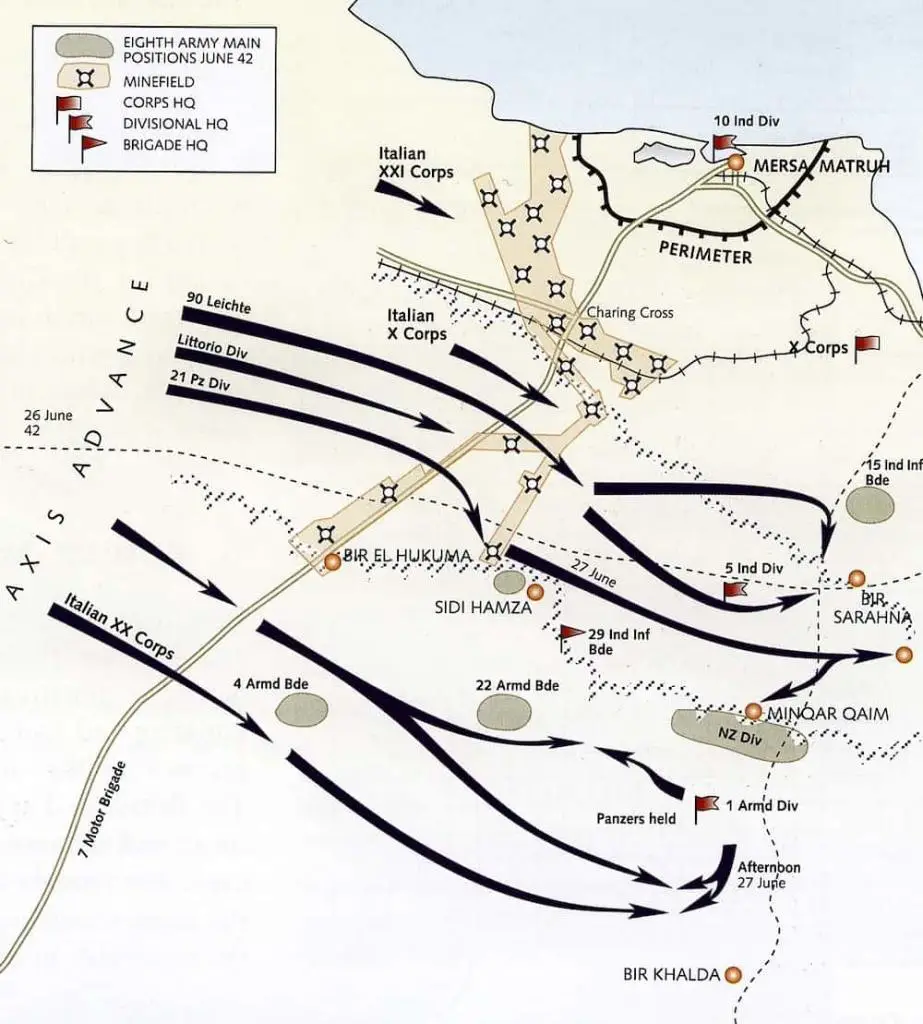
Axis advances in June 1942. Image: Daniel Russ
The attack began on 1st July 1942 but the whole German advance found their path fiercely contested by the Indians and South Africans. The 18th Indian Brigade fought tenaciously, destroying eighteen German tanks and stopped the 21st Panzer Division.
To the north, the 90th Light Division encountered heavy artillery fire from the South African 1st Division. They became overwhelmed and scattered. Field Marshal Erwin Rommel now pushed his personal battle group of about 400 men on to the north, determined to get things going again at top speed. One historian wrote that “Rommel rushed up with the Kampfstaffel and rallied the division, but not even he could get it moving again.”
On 2nd and again on 3rd July, the 15th and 21st Panzer Divisions managed to only muster 26 serviceable tanks. Despite this, they resumed the advance and knocked out 39 British tanks before the British 1st Armored Division drove them back. The Ariete Armored and Trieste Motorized Divisions received orders to attack south. The authors of Rommel’s North Africa Campaign describe the advance as follows:
The Ariete, which had six or eight tanks and 1,000 men, advanced south during the night while the Trieste was ordered to cover her flank, but, instead remained in the same place due to the disorganization caused by enemy air attacks.
The New Zealand 19th Battalion advanced rapidly and engaged the Italian battle group, and the Ariete disengaged with the loss of 531 men and several artillery batteries. The New Zealand Official History exaggerated the enemy material losses and described the Italian setback as “an outstanding episode in the Dominion’s military history” and comments: “It seriously disconcerted both Germans and Italians and made the latter more fearful in subsequent conflicts with the New Zealanders.”
However, the advance of the New Zealand 21st and 22nd Battalions met heavy fire from the Brescia. The New Zealanders or the two battalions could fully press home their attacks.
Rommel in his report of 5th July to Feldmarschall Albert Kesselring, greatly exaggerated his losses in order to accelerate German reinforcements:
The fighting value of the Italian troops is so low that on 3.7., during an attack by inconsiderable enemy armored forces, 360 men of Ariete Division were captured without having offered resistance worthy of the name. In addition, the division lost 28 guns and 100 medium tanks.
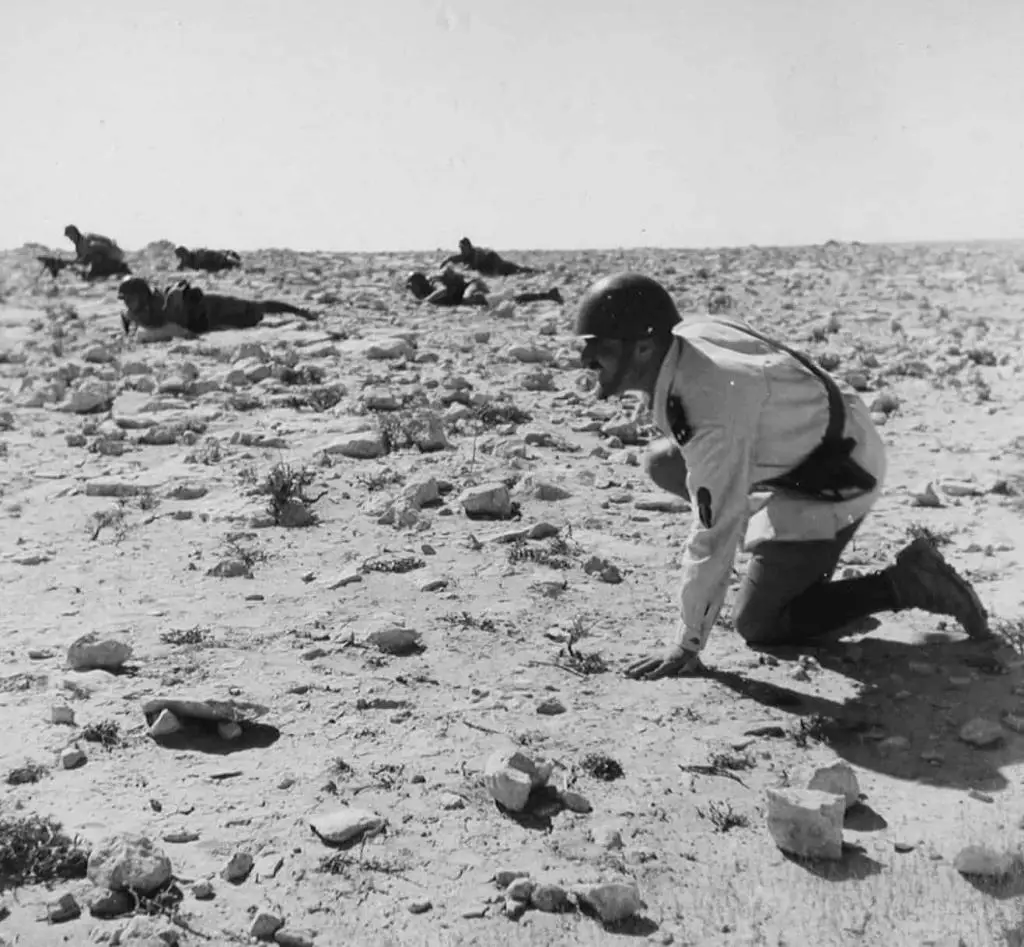
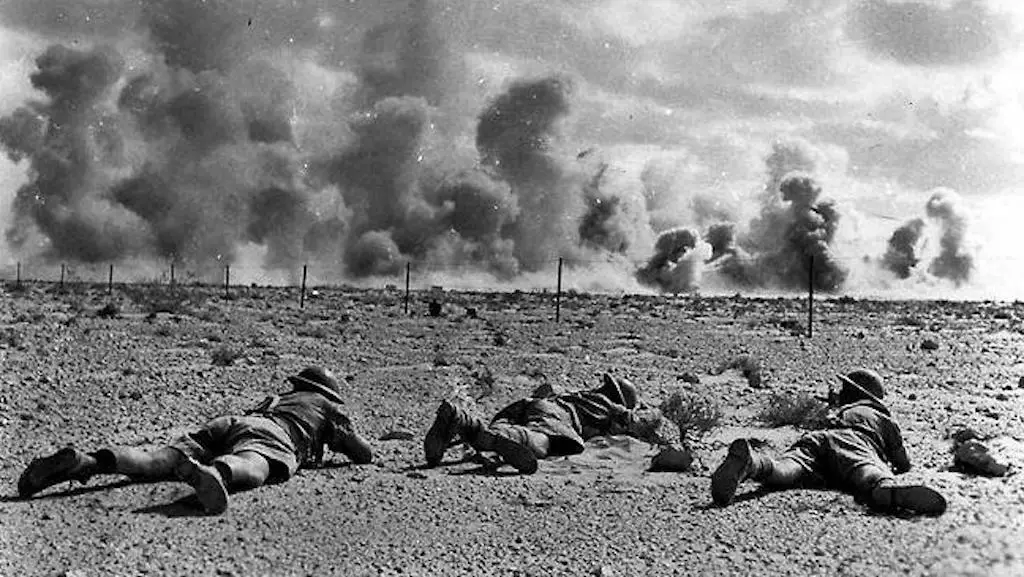
Italian infantry advances at El Alamein.
Fighting continued around the Brescia. The New Zealand 23rd Battalion penetrated the sector. But they received a prompt counterattack and lost a number of their men and equipment. The New Zealand Official History talks about “enemy forces seeping south threatened to outflank the division” but strangely nothing more. But Conrad H. Lanza wrote that Italian soldiers were the enemy involved in the action, in which the New Zealand 2nd Division lost part of their penetration:
One of the night attacks was made by New Zealand troops, a Maori unit which entered and held an enemy strong point in a bayonet attack. They were later counterattacked by the Italian Pavia Division and lost a part of their gains during a severe fight under a fading moon.”
The Vividly Lit Desert Night
The exhausted Germans and the disorganized British put an end to the battle in earnest. But on 10 July the Australians launched an attack at Tel el Eisa in the north, relying on a very strong artillery bombardment. They took 924 German and Italian prisoners and 27 guns. The Sabratha Division, disposed along the feature, received the initial blows of the 2/48th Battalion.
In his papers, Rommel writes that the soldiers of the Sabratha were “throwing away arms and ammunition as they ran. It was primarily the Panzer Army’s staff, led at the time by Lieut.-Col. von Mellenthin, whom we had to thank for bringing the British attack to a halt.” However, the Italian diaries, however, show that their formations were doing their very best to plug the holes punched in the Italian line by the Australians. The authors of Rommel’s North Africa Campaign, Jack Greene and Alessandro Massignani, describe the events of the 10th and the morning of the 11th as follows:
The Aussie attack succeeded in capturing two battalions of the 3rd Celere Artillery Regiment and the headquarters and commander of the 7th Bersaglieri. The remaining part of the Celere was also isolated. Navarini, commander of XXI Corps, immediately sent a battalion of the 7th Bersaglieri and a battalion of the 46th Artillery to block the road…
From Major Paolo Caccia Dominioni’s account of this action:
While the Germans of the 164th, together with a battalion of the Trieste and a few groups of Bersaglieri managed to form up in new positions between the sea and the left flank of the Trento, the decision was taken to recapture Hill 33 and the ridge parallel with the sea, which had already been occupied in force by the enemy and well stocked with artillery. The mission was entrusted to Major Verri’s battalion of the 11th Armored Trieste.
The tanks of the Trieste attacked Tel el Eisa where the Australian 2/24th Battalion dug in. It occurred early Saturday afternoon, while the 7th Bersaglieri Regiment moved out to attack positions near Tel el Eisa railway station. Before the day ended, the Sabratha’s reserve regiment, the 85th, joined in the preparations to attack the Australians. According to the 2/48th Battalion diary:
At approx 2000 hours enemy tanks–number unknown– and inf attacked D Coy front. They overran psn and enemy inf forced D Company to withdraw and occupied their psn.
The Australians counterattacked to cries of “Come on, you Australianoes”. Corporal Tom Derrick wrote that as his battalion prepared to recapture the position he repeatedly used the Italian word for Australians:
We were to move forward in one long extended line, cross the railway line without a sound and on a shot from the OC we were to open up with everything and continue to advance firing as we went and calling out “Come on Australianoes.” … from the din of the Light Machine Guns, Tommy guns, rifles and grenades, also the blood curdling cries of advancing men, the enemy must have thought there were thousands and I think the Australianoes business helped a lot.
On 13th and 14th July, the 15th and 21st Panzer Divisions and the assembled Italian infantry made a concerted effort to retake Tel el Eisa but hurled back with crippling losses. Watching the Tel el Eisa action, Richard D. McMillan of the United Press wrote on the 15th:
Field Marshal Erwin Rommel, in his most determined effort to break through the British lines since the Eighth Army stopped him west of El Alamein, sent his best tank shock troops, supported by Italian infantry, into action at dusk last night against the British position near Tel el Eisa. The Desert night was vividly lit as German guns roared their challenge and British artillery sent shell after shell crashing against German tanks and armored vehicles that were silhouetted against the glare. It was by far the most spectacular night battle I had witnessed in this campaign.
Alamein at Amazon
Thus far, however, Marshal Rommel’s attempt to overrun Tel el Eisa and the sand dunes that dominate the area has not succeeded. The enemy’s efforts up to now have cost him heavily in men killed, wounded, and captured.
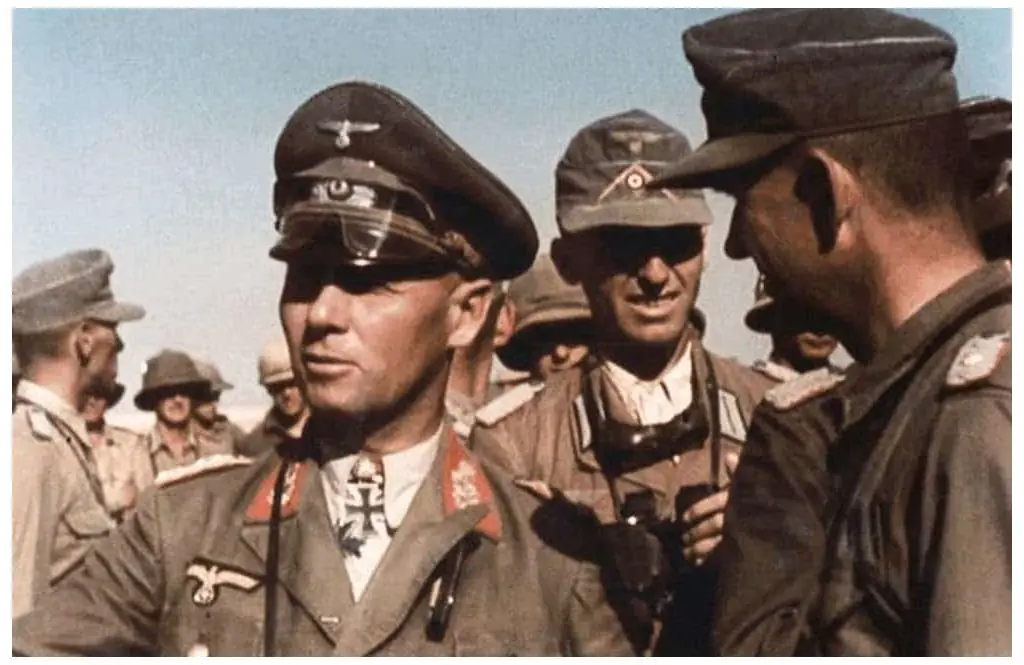
A color photograph of Erwin Rommel and his staff in North Africa.
The German artillery struck with sledgehammer blows, trying to clear a path for the infantry, the progress of which was able to follow through the night by the streams of machine-gun tracer bullets that left a glittering trail just above the ground. Green and white signal flares curled up from the German tanks as they drove forward.
The enemy infantry tried to rush the British positions from dugouts prepared during the day, but it met an incessant fire. At midnight the stonewall defense once again had proved too tough for Marshal Rommel’s elite troops.
On the night of 14th July, Auchinleck counterattacked to relieve the pressure on the Australians, sending his 4th and 5th New Zealand Brigades and 5th Indian Brigade against some 4,000 Italians on Ruweisat Ridge. The attack included fierce close-quarter resistance and intense artillery fire between the night of the 14th and afternoon of 15th July. In a devastating counterattack, German armor recovered the ridge. Total losses, killed and wounded in the 2nd New Zealand Division, exceeded 1,400, a hard and shocking blow to an already depleted infantry division.
Rommel, distraught at his inability to regain the offensive, pressed for a rapid retreat. However, senior Italian commanders issuing fresh orders to Italian units to fight to the last man talked him out of quitting. The following day, the Sabratha in the form of the 85th Regiment retook Tel el Eisa, but suffered heavy losses in the process. Caccia Dominioni writes of the “splendid recapture of Tell el Eisa, carried out by the 1st Battalion 85th Infantry under Colonel Angelozzi on the afternoon of July 14”. On 16th July, the 2/23rd Battalion attempted to retake Tel el Eisa, but stopped its thrusts after incurring heavy losses. In his papers, Rommel writes:
Next day, the 16th July, the British attacked again, but this time only locally. After an intensive artillery preparation, the Australians attacked in the early hours of the morning with tank support and took several strong-points held by the Sabratha.
Later, recounting the 2/23rd Battalion attack, Mark Johnston wrote that on 16 July, they received orders to retake it and the rest of Tel el Eisa Ridge. After initial success, they suffered nearly 50 percent casualties and had to withdraw.”
Related: Second Battle of El Alamein
On 17th July, two Australian battalions attacked south against Italian positions on Sanyet el Miteiriya and Makh Khad Ridge. The Australians captured 700 prisoners. However, they came under fire from Italian gunners who fought well and later counterattacked by tanks and infantry. The Italians captured no less than 200 prisoners. But the Australian War Memorial states it was a German counterattack. However, German records indicate Italians from the 3rd Battalion 61st Trento Infantry Regiment are responsible. The Australian Official History just admits that two forward platoons of the 2/32nd’s left company became overran, 22 men taken prisoner. This implies that Germans captured them.
Johnston in Fighting The Enemy puts this down to “an unwillingness to acknowledge reverses against Italians.”
One group of Italian combat sappers in company strength entrenched on Makh Khad held out all through the predawn darkness till sunrise. All were reported killed or captured, having fought very bravely and well against the Australian 2/32nd Battalion. This gave the Trento Division sufficient time to prepare a counterattack that drove the Australians back.
Many Of These Men Resisted To The Last Bullet
On 21st July, the Indians and New Zealanders launched a night attack designed to capture Ruweisat Ridge, which a Panzer expert calls “The Second Battle of Ruweisat Ridge”. Despite some initial success, various Italian units held out stubbornly until the morning of 22nd July and prevented the capture of Ruweisat Ridge. This put the whole Allied attack out of joint. Then, at dawn, the 21st Panzer Division arrived on the scene and 132 British tanks and 904 New Zealanders were lost, including 500 captured.
Samuel W. Mitcham, drawing upon Caccia-Dominioni’s account in his memoirs, stated that:
A mixed German-Italian combat team held on and proved that not all Italians had lost the will to fight. Many of these men resisted to the last bullet. Their heroic stand gave Rommel time to concentrate his Afrika Korps against the 23rd Armoured Brigade.
The German armored attack and the skills and experience of his Italian troops saved the day, and Rommel knew this. He wrote at the time:
The Italians were willing, unselfish and good comrades in the front line. There can be no disputing that the achievement of all the Italian units, especially the motorized elements, far outstripped any action of the Italian Army for 100 years. Many Italian generals and officers earned our respect as men as well as soldiers.
Radio Rome said:
The fighting which assumed particular tenacity has ended in favour of the Axis. The enemy has been everywhere repelled with counter-attacks and has sustained grave losses in men and materiel. Eight hundred prisoners, mainly New Zealanders, and Indians fell into our hands, and 130 tanks destroyed on the field. During that action the German Afrika Korps and the Italian Brescia and Trieste divisions particularly distinguished themselves.
As a testament to their stubborn resistance, Colonel Gherardo Vaiarini de Piacenza, Commanding Officer 65th Trieste Infantry Regiment, and Colonel Umberto Zanetti, Commanding Officer 66th Trieste Infantry Regiment received posthumous award decorations.
Morrises, Fords, Dingos, and Jeeps
Australian troops advancing toward the line of fire.
Auchinleck’s last effort came in the northern sector. He ordered a two-pronged attack to launch during the night of 26th-27th July. the aim is to break through the Italian lines the Sanyet el Miteiriya. One battalion from 9th Australian and two battalions from the 50th British Divisions were to seize the ridge. From the speech of historian Peter Stanley:
What turned out to be the final British Commonwealth attack in July was to be launched against Axis troops on Sanyet el Miteiriya – known as “Ruin Ridge” from the remains of a building on its crest – a low stony rise running roughly east-west. The Ruin Ridge attack was based on a complex plan involving a night attack through minefields. While an Australian battalion advanced southwards to occupy Ruin Ridge, British battalions would be attacking at right angles. British tanks would then advance through minefields cleared by South African engineers. The aim was to breach a section of the line held by Italian troops, the more brittle element in Rommel’s army.
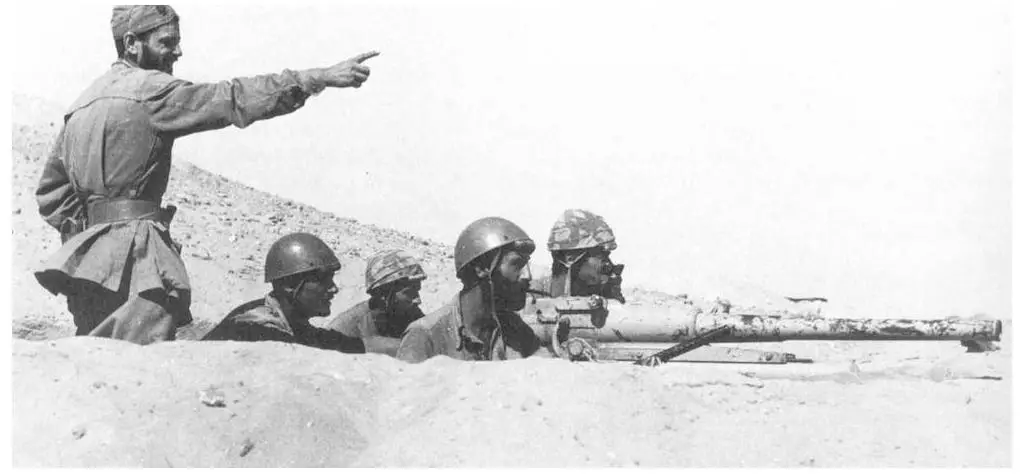
Folgore preparing to fire artillery during the first battle of El Alamein.
The Australian advance began at midnight with heavy artillery fire at the enemy positions followed by the advance of the 2/28th Battalion. Anti-tank guns carried on the lorries of the 2/3rd Anti-Tank Regiment and the infantry battalion’s Bren carriers supported the advance. Under constant fire, the attackers lost thirteen vehicles during the night. Among the casualties were two company commanders. But by 1.10 am the battalion gradually cleared the forward slopes and seized 117 prisoners. However, the 3rd Battalion 61st Trento Infantry Regiment continued to hold out.
A full account of the Trento’s role in the battle and after is provided by Second Lieutenant Eithel Torelli:
On the 27th the bombardment started at dawn and went on till about nine o’clock. Then came the smoke. We opened fire with our machine-guns and 47/32s. We stopped after a bit to see what effects we were having; a slight breeze was clearing the dust. We could see the Australians and British advancing rather spread out, about 750 yards in front of us, all in groups corresponding with their units. We ceased fire with the machine-guns — there was still plenty of time for them — but continued with our 47/32s. Our battery also fired for a time, not for long, but very concentrated while it lasted. We saw the enemy in disorder, and their ambulances coming up. Then they formed up again and continued their advance. It was more difficult to get at them now because of the undulating dunes — like waves in a high sea — gave them plenty of cover. When they came within 300 yards, we opened up with everything. The noise was terrific; you could only tell a gun was firing by the smoke and powder coming out of its muzzle. It was almost eleven o’clock. My tommy-gun broke down after about 3,000 rounds — ejector broken! The machine-gun also played up a bit after 5,000 rounds. But by that time the attack was beginning to peter out. The British artillery had packed it in. By midday it was all over. After the withdrawal, followed by our counterattack, the ambulances returned to start ferrying back the dead and wounded. But we got suspicious after an hour or so because they seemed to be hanging about too much. We fired a few shots over their heads to let them know it was time to break it up. They took the hint and went — and didn’t come back.
From the diary of Lieutenant S. A. Walker:
The Bn was completely surrounded by armored cars which worked forward under cover of fire from enemy tanks further back, while 20mm, MMG, and mortar fire kept the heads of our own troops well down. In this manner the enemy was able to cut off and dispose of sections and platoons one by one until at 1030 hrs Bn HQ area was occupied by several armored cars and surviving personnel taken prisoner. An effort had been made to hinder the enemy armored vehicles by bringing Arty fire to bear on them before they dispersed. Unfortunately, the only communication with Bde was by one wireless set WT repaired by Sigs, after about eight hours of work. Messages reporting the situation were sent immediately once this set was capable of functioning, i.e., about 0930 hrs onwards. The last message was “All up, overrun!”
The Reconnaissance Group of the Trieste delivered the counterattack. Its own vehicles worn out, this force became hastily reformed from Morris, Dingo, and Ford armored cars. The swiftness of the attack caught the Australian 2/28th Battalion by surprise. At 9.43 am the Australian battalion commander reported, “We are in trouble. We need help–now”, he signaled. “Are there any of our tanks helping us? There are tanks all round us. You had better hurry up.”
The battalion commander frantically tried getting artillery support. But with the Trieste’s Reconnaissance Group rapidly closing in, the battalion became soon overrun. In a stunning defeat for Auchinleck, about 1,000 British and Australians fell into enemy hands at Sanyet el Miteiriya.
Caccia Dominioni of the 31st Combat Sappers Battalion recalls the reaction of the Italian soldiers:
The names of certain units were on everyone’s lips up and down the line following particularly brilliant actions, among them the Reconnaissance Group of the Trieste. It had been set up some time previously: it was hardly a homogeneous unit on the German pattern, but did reflect admirably the Italian genius of improvisation. They had no more than nine vehicles–Morrises, Fords, Dingos and Jeeps, all captured from the enemy–armed with small caliber guns and machine-guns of all descriptions, British, Italian and German, together with two British 88 guns and their carriages, and two small supply lorries.
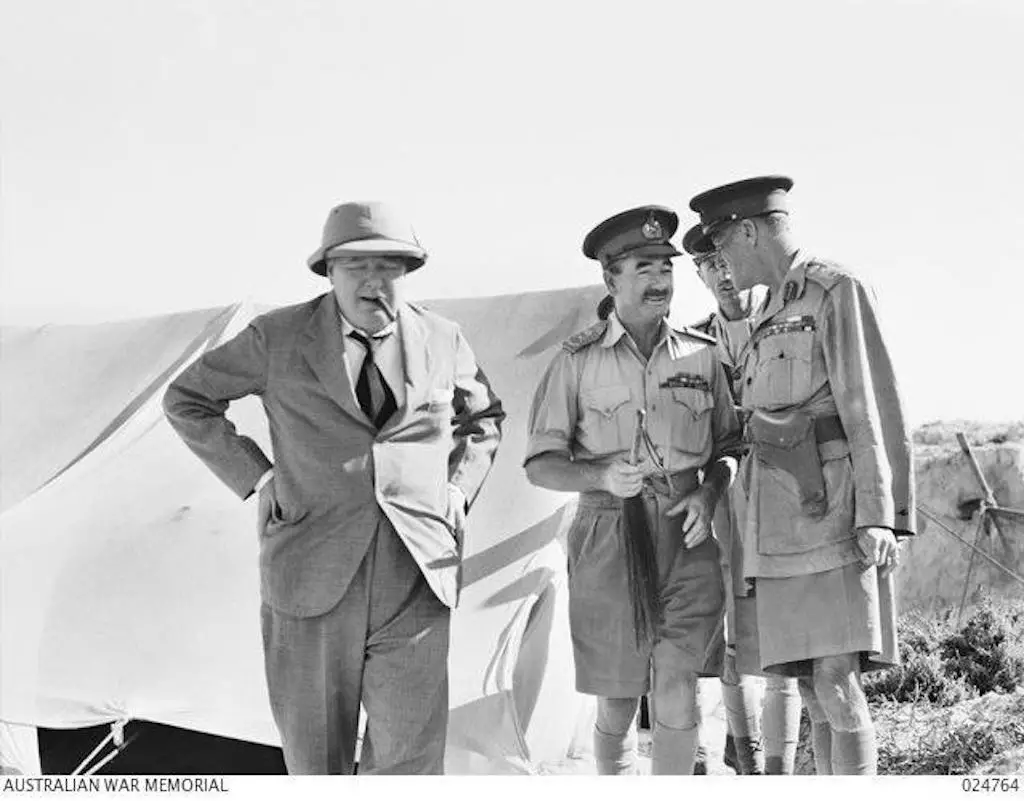
05 August 1942 photo (L-R) Prime Minister Churchill, LT General Leslie Morshead, General Claude Auchinleck and Lt Gen W.H.C. Ramsden at the 9th Australian Division Headquarters, El Alamein, Egypt. Image: Public Domain.
Stunned by these violent assaults and rapid series of defeats, both sides lay exhausted and the battle petered out. General Auchinleck and the Eighth Army claimed a victory of sorts since it stopped Rommel’s advance. But as Alan F. Wilt notes:
Yet, overall, between May 26 and July 21, Axis forces had once again proved far superior. Despite heavy losses, in both men and equipment, the German and Italian forces had advanced 290 miles, their farthest easterly penetration during all of the North Africa campaigns, almost to Alexandria itself.
Results of the First Battle of El Alamein
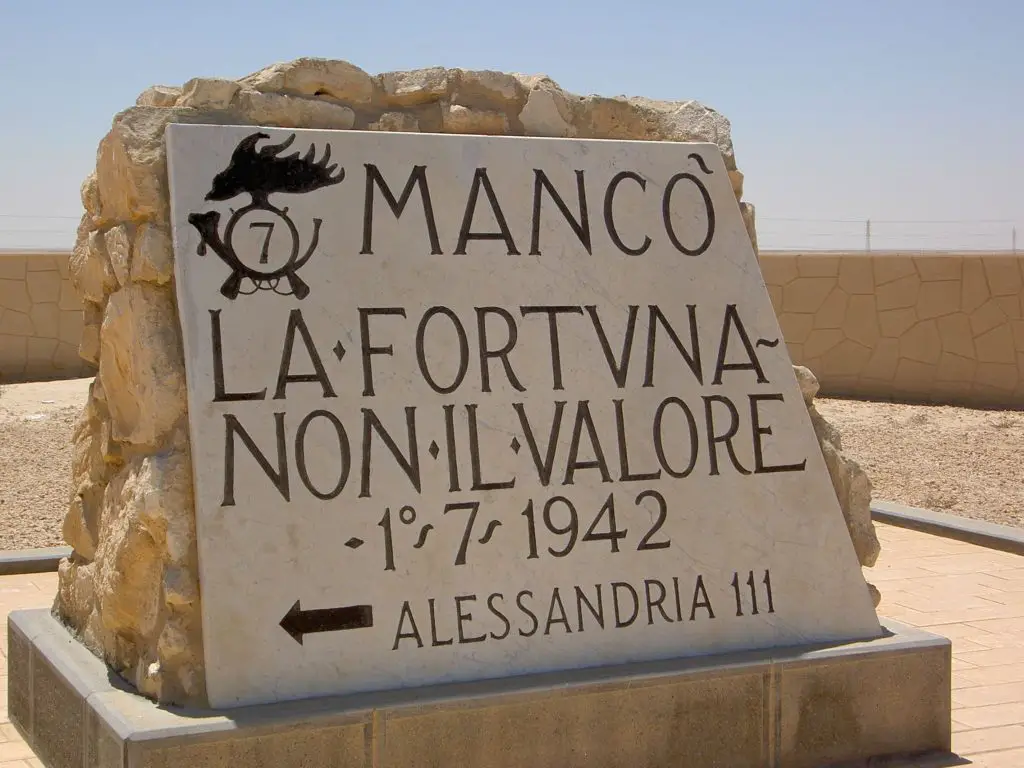
Commemorative stone put up by the 7th Bersaglieri Regiment on the road from Alexandria to El Alamein. The sign translates to “Lack of fortune, not valor.” Image credit: Acad Ronin. CC 3.0
The Commonwealth troops, particularly the New Zealanders, felt that their attacks were not handled well. There were in fact, some 13,000 British Commonwealth casualties; total Axis casualties were about 13,000, including 7,000 captured in the three weeks of fighting. Churchill, disappointed at the failure of the British counterattacks, decided that Auchinleck must go. On 8th August, he removed Auchinleck from command.
References:
The Global War by Horst Boog
Rommel’s Desert War: The Life and Death of the Afrika Korps (Stackpole Military History Series)
Rommel’s North Africa Campaign: September 1940-November 1942 (Great Campaigns)
The Official History Of New Zealand In The Second World War
The Axis Invade Egypt by Conrad H. Lanza
Alamein, 1933-1962 (Guerre fasciste e seconda guerra mondiale) (Italian Edition)
2/48th Battalion War Diary
Vain Axis Assault Fires Desert Night by Richard D. McMillan
2/32nd Battalion Website Australian War Memorial
The World Almanac And Book Of Facts 1942
Ruin Ridge by Peter Stanley
July 1942 Diary by Lieutenant S. A. Walker
